I had a note (or ‘action item’) to make sure that people were informed regarding the ‘uninstall’ of SQL Server, since non-DBA server administrators would like to know more detail on this. The process is not obvious from Control Panels’ Programs and Features (long list of components), so here’s my preferred method (*), which allows for a more specific uninstall, which can also include all the components at the same time (below you see these as the /Features list). This can also save DBAs too, since there have been two occasions over the past three or so years, when the wrong instance name was installed, and we had to remove, reboot, and reinstall with the correct one afterwards.
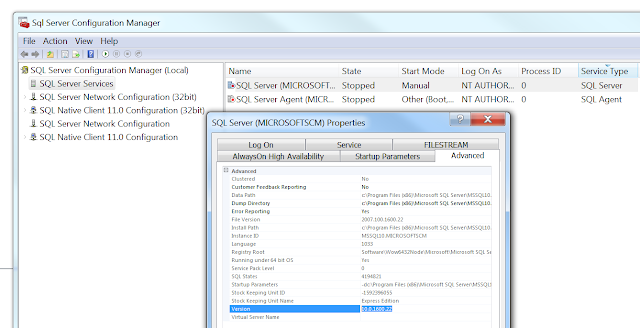
First thing you need is locate the SQL Server installation media, which is internally stored on our network shares for DBAs, or available from download on Microsoft’s site - just be sure to grab the correct version. If you don’t know the version you have installed, open up from the start menu Microsoft SQL Server, Configuration Tools, and finally SQL Configuration Manager. SQL Server Services…and in the right pane, if you see Service Type SQL Server, right click and view the properties. At the bottom of the Advanced page it should be clearly indicated what version is installed:
 |
| SQL Server Configuration Manager (2014) |
Thus, since the version is 10.0.1600, we can see from sqlserverbuilds.blogspot.com that we’ll need to download the same media to remove it properly https://www.microsoft.com/en-ca/download/details.aspx?id=25052 (and I’m making sure I get rid of this instance on my workstation b/c I really do not need a vulnerability hanging around that I surely can try and remove). Here's the general format for the uninstall command with several components in the example:
setup.exe /ACTION="unInstall" /INDICATEPROGRESS="TRUE" /FEATURES=SQLENGINE,REPLICATION,FULLTEXT,BIDS,CONN,IS,BC,SDK,BOL,SSMS,ADV_SSMS,OCS /INSTANCENAME="InstanceName"
SQL 2008 express with SP1 was downloaded matching the X86 version installed (as we can see in the image above). I noticed, after running the downloaded executable afterwards, As Admin, that a folder was created C:\e2f2e9f6f311cfa21667f9 (sort your primary disk by date, it should be obvious). If you have trouble finding it, find and run the executable for setup (it’s the same directory).
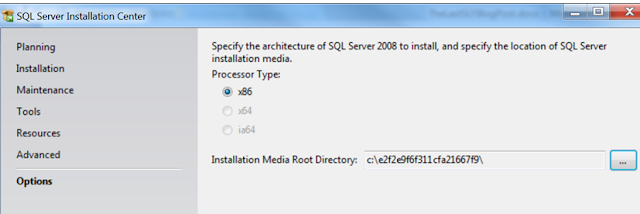
SQL 2008 express with SP1 was downloaded matching the X86 version installed (as we can see in the image above). I noticed, after running the downloaded executable afterwards, As Admin, that a folder was created C:\e2f2e9f6f311cfa21667f9 (sort your primary disk by date, it should be obvious). If you have trouble finding it, find and run the executable for setup (it’s the same directory).

Then I went to command line under this directory and pasted the uninstall command from above, with the actual instance name, and with the necessary feature I have to remove (in my case, only a single component):
setup.exe /ACTION="unInstall" /INDICATEPROGRESS="TRUE" /FEATURES=SQLENGINE /INSTANCENAME="MicrosoftSCM"
setup.exe /ACTION="unInstall" /INDICATEPROGRESS="TRUE" /FEATURES=SQLENGINE /INSTANCENAME="MicrosoftSCM"
And then all the dialogue boxes open up, since we asked to indicate progress with the /indicateprogress switch, which means that you’ll still see the command line running still behind the GUI, and can even find the sql server install bootstrap logs afterwards for review, in the case of error. Mine were stored to:
C:\Program Files (x86)\Microsoft SQL Server\100\Setup Bootstrap\Log\20160627_142130\
C:\Program Files (x86)\Microsoft SQL Server\100\Setup Bootstrap\Log\20160627_142130\
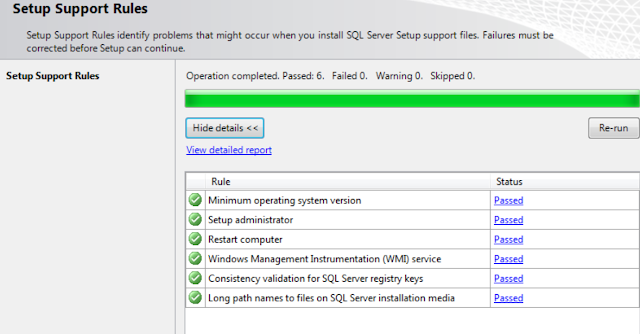 |
| SQL Server Removal/Install Setup Rules |
As of this status window above, I should be safe to proceed:
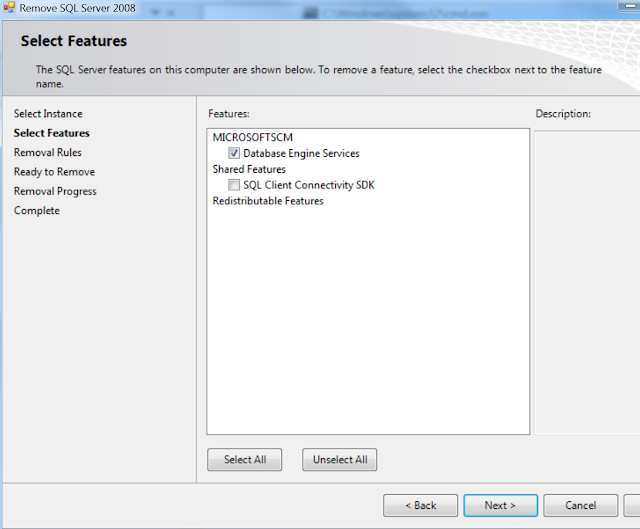
Chose the MicrosofSCM instance, and confirm the engine is to be removed. If we don’t know all the components installs, here’s the reason we use the show installation progress switch – it thankfully will tell you all that are related to this install automatically (so Select all if you want, in my case the SDK wasn’t the issue):
REMOVE J
And of course, the configuration file path is there again under setup bootstrap.
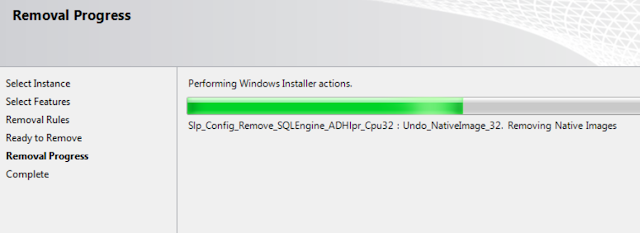
Rejoice when you see that it has almost finished, and confirmed during the removal process.
It may not say it, but it sure is good to reboot after removing this instance and confirm upon restart.
Success, and quite a relief (bet you have rarely seen such a long uninstall, right?).
Note that as soon as you’ve exited the installation, the temporary folder that was created for the media is now gone. If you really want to clean up fully, delete the SQLEXPRE_x86_ENU.exe file from your downloads folder (or your respective version, SQLEXPRE_x64_ENU.exe for that platform).
Happy Uninstalls to you, and Happy Canada Day!
* Nota Bene. this DB instance I am picking on, is just an example, not to say everyone must run out and remove it, since it could be in use by your workstation admins!



No comments:
Post a Comment